SkyBridge Plus · Volume 3
SkyBridge Plus — Vol 3: Configuration & Backups
BridgeCom commercial DMR hotspot — turnkey appliance
3.1 Hotspot configuration workflow
The SkyBridge Plus is web-managed end to end — once it is on the local network there is no command-line discipline required to configure it for normal operation. The configuration sequence below is for first-power-up out of the box.
3.1.1 Onboarding — the Wi-Fi captive-portal trick
On first power-up, the SkyBridge boots into an AP mode — it advertises a Wi-Fi network with a SSID like “BridgeCom-Pi-Star-Setup” or similar (the BridgeCom variant of the upstream WPSD Wi-Fi-onboarding pattern), with an open-network captive portal that lets the user join their home Wi-Fi from a phone or laptop. Connect a phone to that SSID, accept the captive-portal redirect, fill in the home SSID and PSK, and the SkyBridge writes a wpa_supplicant.conf to the boot partition, reboots, and joins the home network as a client. The whole onboarding flow takes 2-5 minutes. The wpa_supplicant.conf.docx in ../../programs/wpsd-hotspot/ holds the credentials for both hotspots (the SkyBridge and the DIY WPSD); the NetworkManager-style profile at ../../programs/skybridge-plus/FBI_Surveillance_Van__3.nmconnection is the modern alternative for environments where NetworkManager is the supplicant rather than wpa_supplicant — the SSID in the filename is the Wi-Fi network the SkyBridge is currently joined to (it has previously been on FBI_Surveillance_Van_3 and FBI_Surveillance_Van_4 — the family Wi-Fi keeps the same prefix and bumps the trailing number as routers get swapped). Both supplicant flavours produce the same end-state — the Pi Zero W on board the SkyBridge is joined to the home Wi-Fi as a DHCP client.
3.1.2 Finding the device on the LAN
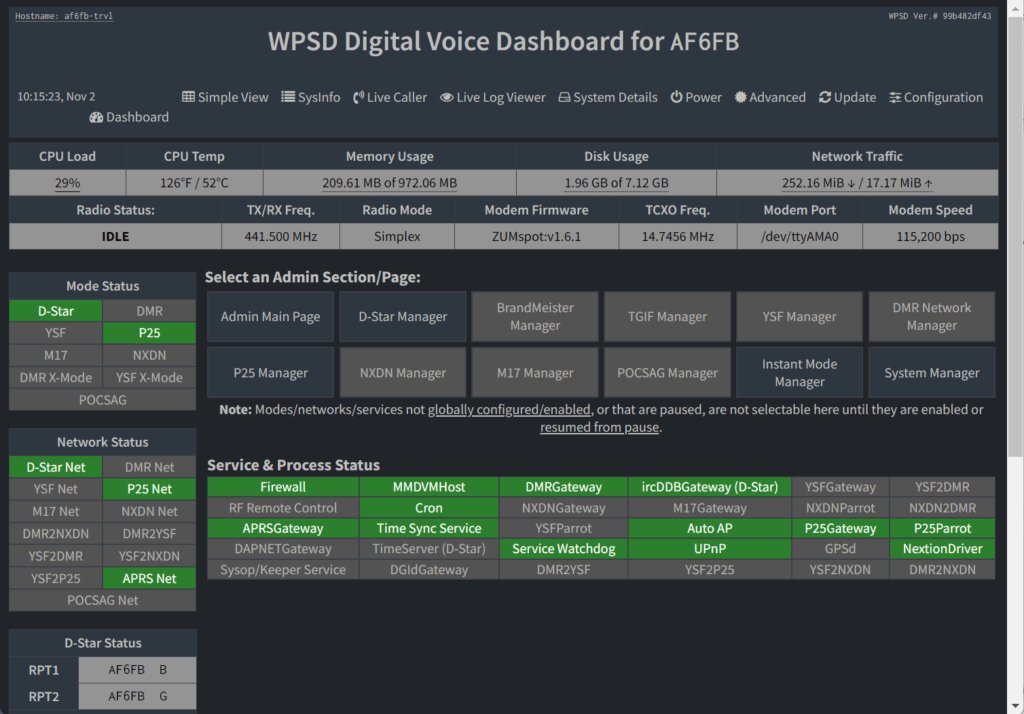
After the SkyBridge joins the home network, it advertises mDNS as skybridge.local (or a similar BridgeCom-customised name; TBD — verify against the bench unit), and it accepts a DHCP-assigned IP from the home DHCP server. The browser-side workflow is to point a browser at http://skybridge.local/ (or the IP from the router’s DHCP-lease table) and the WPSD dashboard appears. Default login credentials are pi-star / raspberry (the upstream WPSD default, unchanged by BridgeCom on the factory image) — change them on first login from the dashboard’s Configuration > Security panel. The WPSD dashboard is the entire administrative surface.
3.1.3 Core configuration items
In the WPSD dashboard’s Configuration panel, fill in the following for a working DMR hotspot:
- Callsign — the operator’s amateur callsign (N0SWN in this setup). Used as the identifier on every DMR transmission and on the dashboard.
- DMR ID — the 6- or 7-digit DMR ID from radioid.net, registered against the operator’s amateur callsign with proof-of-license. The same DMR ID is used in the radio’s codeplug (Vol 8 §6 ↗).
- Frequency (TX and RX) — the hotspot’s operating frequency. For simplex operation, TX = RX; for duplex, set the +/- offset. Pick a frequency in the local repeater coordinator’s published low-power-simplex / hotspot allocation. 70 cm common choices in the US fall in the 433-435 MHz range; verify against your local repeater plan before committing.
- Colour code — DMR’s per-channel layer-1 squelch tone, integer 0-15. Convention for a personal hotspot is CC 1, which is also the default in the BridgeCom factory image and matches the default on a fresh AnyTone D878 channel.
- TX power — typically 10-20 mW on the hotspot. The MMDVM hat exposes a “TX Level” parameter (range 0-255, with the BridgeCom factory default around 60-80 which corresponds to roughly 10-20 mW EIRP on the small stock antenna). The hotspot is a same-room companion to the radio; it does not need more power. See §7 for the “don’t try to extend range” point.
- Network selection — choose one or more of BrandMeister / TGIF / W0CHP / DAPNET / FCS / XLX. Each network has its own dashboard sub-panel with a server hostname, a personal API key (BrandMeister and TGIF require account registration on the network’s website to issue a key), and a connection-status indicator. The BridgeCom factory image pre-populates the network server hostnames; the user fills in the API keys.
- Talkgroup routing — split between static talkgroups (always-on, the hotspot transports traffic from these talkgroups onto the local RF channel without requiring the radio to key) and dynamic talkgroups (the hotspot subscribes when the radio keys to that talkgroup, holds the subscription for a timeout period (typically 15 min), then releases). The static / dynamic distinction is a BrandMeister network concept; TGIF handles it differently. See Vol 2 §6 (Talkgroup hygiene) ↗ for the operational treatment.
- Modem type — the dashboard’s Modem panel; pick the MMDVM hat model that matches what’s installed in the SkyBridge. The BridgeCom factory image has this pre-set correctly; only change it if the hat has been swapped.
The dashboard’s Save button writes the changes to the WPSD config tree under /etc/pi-star/ (the legacy WPSD path retained for backward compatibility with the upstream Pi-Star tooling), restarts the affected daemons (MMDVMHost, DMRGateway, etc.), and shows the new state in the live dashboard panels within ~10 seconds. No reboot is required for any change other than network-mode toggles.
3.1.4 Firmware updates
BridgeCom periodically releases SkyBridge firmware updates — these are bundled as a WPSD-formatted update package that the dashboard’s Configuration > Update panel can download and apply. The cadence is roughly monthly; major updates (new WPSD upstream releases) are quarterly. The update preserves the user’s configuration; the BridgeCom support apparatus is the right escalation path if an update misbehaves on a specific deployment. As of mid-2026 the current SkyBridge image is built on a WPSD release from a few months back (TBD — verify exact build date and version against the bench unit by reading the dashboard’s “About” panel). The conservative cadence — compared to running upstream WPSD nightlies on the DIY hotspot in Vol 22 — is precisely the appliance-vendor tradeoff that distinguishes the SkyBridge from the DIY: BridgeCom validates each release before pushing it, at the cost of running a few weeks behind the upstream cutting edge.
3.1.5 Optional advanced configuration
For the operator who wants more than the dashboard exposes, SSH is available — ssh [email protected], password raspberry (change on first login). The SSH access opens up the underlying Linux filesystem, the WPSD daemon configurations, and the standard MMDVMHost / DMRGateway / YSFGateway config files. BridgeCom’s support stance is that SSH access is unsupported — if you change something via SSH and break the dashboard, you’re on your own to fix it — but the door is open. Most operators never need to. The configuration items that occasionally justify SSH access: editing the MMDVMHost RxLevel and TxLevel parameters more finely than the dashboard’s slider, custom cron jobs for log rotation, manually editing DMRGateway.ini for advanced routing rules. For routine operation the dashboard is enough.
3.2 Network config backups
The WPSD dashboard’s Configuration > Backup/Restore panel exports the entire /etc/pi-star/ config tree plus MMDVM.ini, MMDVMHost.ini, DMRGateway.ini, the YSF/NXDN/P25/M17 gateway INIs, and the Wi-Fi credentials into a single timestamped ZIP file. The ZIP is downloadable through the browser to the local machine; restore is the inverse — upload the ZIP through the same dashboard panel and the WPSD stack writes back the saved tree and restarts the daemons. The Backup/Restore mechanism is the only sanctioned way to migrate a configuration between SkyBridge units (e.g. RMA replacement) or between major firmware updates.
The local backup hierarchy lives under ../../programs/skybridge-plus/:
programs/skybridge-plus/
├── SkyBridge Plus.xlsx                  ← config notes, serial number, DMR ID, frequency, talkgroup map
├── WPSD_Config_skybridge_2025-Dec-29.zip ← most recent WPSD export
└── FBI_Surveillance_Van__3.nmconnection ← NetworkManager profile for the SkyBridge's Wi-Fi
The SkyBridge Plus.xlsx spreadsheet is the per-device configuration record — sheet tabs for the serial number / asset tag / purchase date, the configured DMR ID and callsign, the operating frequency (TX and RX, colour code, slot, network), the static talkgroup list, the dynamic talkgroup allowance, the bound API keys (redacted in the spreadsheet — the actual API keys live in the WPSD config ZIP), and a free-form notes column for “what changed and why.” The spreadsheet is the cross-check against the dashboard — if the dashboard shows a different state than the spreadsheet, one of them is wrong and the operator’s first task is to figure out which.
The WPSD_Config_skybridge_2025-Dec-29.zip is the most recent dashboard export, dated 2025-12-29. The backup cadence: re-backup quarterly, before every firmware update, and after any non-trivial configuration change (new talkgroup added, network changed, frequency changed, API key rotated). The filename convention is WPSD_Config_skybridge_YYYY-MMM-DD.zip to match the BridgeCom-side timestamping.
The FBI_Surveillance_Van__3.nmconnection file is the NetworkManager-format profile for the SkyBridge’s Wi-Fi connection — the SSID (the family Wi-Fi prefix is “FBI_Surveillance_Van_” with a trailing version number, currently “_3”), the PSK, and the supplicant configuration. The file is Linux-formatted (newline conventions, file permissions in the comments) and would be dropped into /etc/NetworkManager/system-connections/ on a NetworkManager-driven Pi if the SkyBridge ever needed its supplicant rebuilt from scratch outside the dashboard. For a vanilla wpa_supplicant.conf reconstruction, the same credentials are also captured in ../../programs/wpsd-hotspot/wpa_supplicant.conf.docx (which covers both the SkyBridge and the DIY WPSD).
Restore workflow (the recovery procedure if the SkyBridge SD card fails or the image is corrupt):
- Acquire a replacement microSD with the BridgeCom factory SkyBridge image (BridgeCom sells these as a support service; or for a more involved recovery, the WPSD upstream image can be flashed and then customised back to SkyBridge configuration).
- First-power-up onboarding: connect to the AP-mode Wi-Fi, complete the captive-portal Wi-Fi join.
- Log into the dashboard at
http://skybridge.local/, change the default password. - Configuration > Backup/Restore > Upload the most recent WPSD_Config zip → click Restore. The dashboard unpacks the config tree and restarts the daemons.
- Verify the dashboard shows the expected callsign / DMR ID / frequency / talkgroups; verify the hotspot connects to BrandMeister and TGIF; key the AnyTone on the configured frequency and confirm the LED behaviour and the dashboard’s “Last Heard” list shows the transmission.
End-to-end recovery takes 15-30 minutes given a fresh SD card and the most recent backup. Without a backup, the recovery falls back to re-entering all the configuration items from the SkyBridge Plus.xlsx — which is precisely why the spreadsheet is the cross-check.
Comments (0)