MFJ CW Gear · Volume 2
MFJ CW Gear — Vol 2: Operations & Practice
Operating both instruments — modes, Farnsworth, keyer setup, on-air workflow
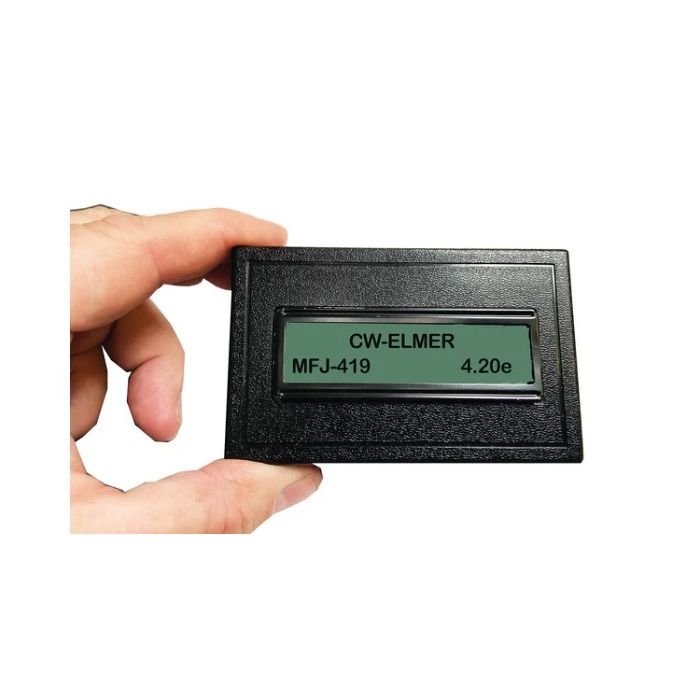
2.1 MFJ-419 CW Elmer (Morse code practice generator)
2.1.1 Operating modes
The 419 has four canonical modes:
Table 1 — The 419 has four canonical modes
| Mode | What it does | Pedagogical purpose |
|---|---|---|
| Receive | Generates code from a built-in character set or USB-uploaded text and plays it back at the configured WPM | Copy practice — listen and write down what you hear |
| Send | Listens to the operator’s key input (internal touch key or external key/paddle) and displays the interpreted characters on the LCD | Sending practice — verify your own timing |
| Analyze | Same as Send but reports timing statistics — dot length, dash length, intra-character spacing, inter-character spacing — against the WPM target | Self-diagnosis of fist quality |
| Exercise | Structured drills for dit/dah length and spacing | Initial-learning scaffold |
The receive-mode character set can be selected: the 26 alphabetic letters only, alpha + numerals, the full extended set including punctuation and prosigns (BT, AR, SK, KN, etc.), or QSO-format simulated random text (callsigns, RST reports, QTH exchange). For a learner working through the standard FCC Element 1 character set historically required for the General/Extra (now retired), the equivalent practice is the letters + numerals + period + comma + question mark + AR + SK + BT + fraction-bar DN — all generated as a randomized stream.
2.1.2 The Farnsworth method (and why it’s the right default)
The 419 implements the Farnsworth method of CW training, which is the load-bearing pedagogical feature. Conventional code instruction starts the student at the slowest speed where the dots and dashes are individually audible — typically 5 WPM — and builds speed by increasing the rate of both elements and spacing simultaneously. This works for the first 10 WPM but produces a “5-WPM plateau” where the student has internalized the sound of slow elements (where individual dots are clearly heard as separate beeps) but cannot bridge to faster speeds where elements blur into characters. The Farnsworth approach starts the element rate at full target speed (say, 18 WPM character speed) but stretches the spacing between characters so the effective copy rate is slower (say, 8 WPM effective). The student hears characters at their final, recognizable rhythm from day one, but has enough thinking time between them to write down what they just heard. As skill grows, the spacing tightens; the character speed stays the same, and the operator transitions seamlessly into full-speed copy without re-learning the sound of any individual character.
On the 419 the Farnsworth speed is set independently of the character speed — set the character speed at 18 WPM and the Farnsworth (effective) speed at 8 WPM, and the unit sends 18-WPM characters with 8-WPM-equivalent spacing. Walk the Farnsworth speed up over weeks as proficiency grows. For an Amateur-Extra-class holder who already has CW proficiency, the use case is maintenance and speed-building: set character speed at 22-25 WPM, Farnsworth at the same, and run blind-copy drills off the random-character or QSO-simulator mode for 15 minutes a day.
2.1.3 USB text mode — the killer feature for serious practice
The 419’s Micro-USB connector exposes a CDC-ACM serial port when plugged into a computer. With any terminal program (PuTTY, Tera Term, minicom, screen on macOS/Linux), the operator can type text into the terminal and the 419 plays it back as Morse code at the configured speed. Even better: paste a paragraph from a news article, an ARRL bulletin, or a QST article into the terminal, and the 419 plays the whole thing as continuous code. This is vastly more useful than the built-in random-character generator because it exposes the operator to realistic English text — word patterns, common-letter combinations (TH, ER, ING, ION), typical sentence structure, and the cognitive load of reading actual prose rather than random consonants.
The recommended practice routine is: copy a 5-minute QST or ARRL Letter excerpt at 18-WPM Farnsworth (effective 12 WPM), self-grade by comparing written-down copy against the source text, then bump the speed up by 1 WPM each session until the error rate exceeds ~10%, then hold the speed there for a week before bumping again. This is the same training pattern that the W1AW Code Practice Bulletins have been broadcasting on HF since 1936 — but with the 419 you can do it on demand on the desktop without needing the bulletin schedule to coincide with practice time.
2.1.4 Pairing with a real receiver for “blind copy” practice
Once the operator is comfortable with 15-20 WPM copy off the 419, the next step is real on-air copy. Tune any HF rig (the X6100 in Vol 9, the Tecsun PL-880 in Vol 11 for shortwave broadcasters, or any of the Uniden scanners for the rare amateur-band trunked CW practice net) to a CW segment of any band — 7.025–7.040 MHz on 40 m, 14.025–14.050 MHz on 20 m, 3.500–3.580 MHz on 80 m, the W1AW schedule on multiple bands. Listen to real operators sending at unpredictable speeds with realistic noise, fading, and timing variations. The 419’s perfect machine-generated code is a sanitized practice environment; real on-air code is the test.
The 419 is still useful in this phase as a warmup tool — 5 minutes of 18-WPM machine code at the start of a CW session calibrates the ear to character recognition before the operator tunes into the band.
2.1.5 Battery life, power notes
A standard 9 V alkaline battery (NEDA 1604A) gives the 419 about 8-12 hours of active use with the LCD backlight on and speaker driven; longer with backlight off and headphones used. The unit operates down to about 6 V before behavior becomes erratic — well below the 9 V nominal — so a “weak” 9 V will still drive the unit but should be replaced when text decode reliability drops. USB power is a clean alternative for desktop use; a 10-pack of USB-A-to-Micro-USB-B cables is one of the things to keep in the radio drawer alongside the 419.
For storage, remove the battery if the unit will sit unused for weeks. Alkaline 9 V batteries leak; the leak destroys the battery clip and the nearby PCB if left in contact too long. This is the universal rule for low-current battery-powered electronics and the 419 is no exception.
2.1.6 MFJ Enterprises closure (mid-2024) — context for parts and service
MFJ Enterprises announced wind-down in early 2024, with Martin F. Jue (MFJ’s founder, callsign K5MFJ — the company’s namesake) announcing the closure of MFJ Enterprises, Ameritron, Hy-Gain, Cushcraft, Mirage, and Vectronics in a Facebook post on April 25, 2024. The factory in Starkville, Mississippi shut down production runs over the following months; warranty service ran through a sunset period through late 2024. As of mid-2026, the MFJ-419 is out of production and replacement units must come from the secondary market (eBay, Amazon, Ham Radio Outlet residual stock, DX Engineering closeouts). Parts and warranty service for any MFJ product, including the 419, are no longer available through MFJ itself, though some independent ham-radio service shops (Burghardt Amateur Center, W4RT Electronics — the latter also closed in 2024 — and a handful of regional repair shops) may take on individual repair requests. The instrument is simple enough (LCD, microcontroller, audio amplifier, key-input front-end) that a competent repair by a small electronics shop is feasible; the LCD module and the microcontroller are standard parts available on the secondary market.
For the operator’s purposes today (mid-2026): the MFJ-419 on the bench is functional, won’t go obsolete because the standard hasn’t changed, and the wear items are the battery clip and the touch-key contact surface — both replaceable with non-MFJ parts.
2.2 MFJ-422D Electronic Keyer Paddle
2.2.1 Iambic keyer + paddle integration
The “iambic” in the name refers to the keying logic. A traditional straight key generates one element (dot or dash) per press — manually timed by the operator. A semi-automatic key (a “bug”) generates dots automatically while the operator presses one side and forms dashes manually with the other. An iambic keyer generates both dots and dashes automatically when the operator presses (or “squeezes”) both paddles together, alternating dot-dash-dot-dash for as long as the squeeze is held. This dramatically reduces the cognitive load for sending common iambic patterns (“CQ” = dah-di-dah-di dah-dah-di-dah, where the dah-di portion of C is a natural iambic squeeze).
The 422D supports both Iambic Type A and Iambic Type B keying, jumper-selectable inside the case (JMP3 on the main PCB; factory default is Type A):
- Type A finishes whatever element is in progress when the squeeze is released — clean, predictable, and the original Curtis-keyer convention.
- Type B adds the opposite element when the squeeze is released during an element. Example: in Type A, releasing the squeeze during the “dah” of letter A (di-dah) produces “dit-dah” (A). In Type B, the same release produces “dit-dah-dit” (R) — the keyer “remembers” the squeeze and inserts the alternating element after the in-progress element completes. Type B is the modern default in commercial keyers (the Begali EVO, the Vibroplex Code Warrior Jr, most Yaesu/Icom/Kenwood built-in keyers default Type B) and what most CW operators expect today.
For a new CW operator coming from a clean slate, Type B is the right pick — it’s what other operators’ keyers will produce, so consistent muscle memory across rigs is preserved. Open the case, set JMP3 to B, close the case. TBD — confirm the current JMP3 position on the unit; the factory default is A and that’s what would be in place on an out-of-box unit.
2.2.2 Speed, weighting, sidetone, and tune controls
-
Speed: continuously variable rotary control on the left side of the unit. Internal jumper JMP9 selects between two speed ranges: 5–65 WPM (factory default, JMP9 = L) or 10–40 WPM (JMP9 = H, less-sensitive control feel). For a learning operator running at 12-20 WPM most of the time, the 10–40 WPM range gives finer control across the operating range; for a contest-grade operator wanting access to 30+ WPM, the 5–65 WPM range is the right choice. TBD — confirm JMP9 position on the unit.
-
Volume: rotary control on the left side, sets the internal speaker’s sidetone level. Independent of the keying output.
-
Weighting: rear-panel trimpot (small-flathead screwdriver access through a hole). Varies the dot/dash element-to-space ratio from ~25% (light, “swing” sound) to ~75% (heavy, “thudded” sound), with the standard 1:3:1 dot-dash-space ratio at the midpoint (50%). Most CW operators leave this at midpoint; some contesters bias it toward 60% for cleaner audio under noise. Set once, leave alone.
-
Tone: rear-panel trimpot, sidetone pitch from approximately 300 Hz to 1200 Hz. The “right” pitch depends on hearing — operators with high-frequency hearing loss tend to prefer 500–600 Hz; younger operators or those with full HF hearing often run 700–800 Hz. Set to taste; the on-air signal is unaffected (sidetone is the operator’s local monitor only).
-
Tune: not exposed as a separate front-panel control; the unit doesn’t have a dedicated tune mode. To tune up an amp through the 422D, send a continuous string of dits or hold the dash paddle — the keyer will key the rig in semi-automatic mode and the amp will see a near-continuous carrier. For the XPA125B in Vol 10, tune at low drive (~10–20 W) for 2–3 seconds, then release. For “long” tune-ups (15+ seconds for finicky autotuners) a dedicated rig-side tune button is the better path; the 422D is not designed for sustained tune drive.
2.2.3 Plugging into HF rig (which X6100 jack, what cable)
The 422D’s keying output is an RCA jack on the rear panel labeled J2. The keying circuit supports both direct keying (most solid-state rigs, including all modern Yaesu/Icom/Kenwood/Xiegu transceivers — the keyer pulls the rig’s keying line to ground to key) and grid-block keying (most vintage tube-final transmitters — the keyer pulls a high-voltage line down to ground). Jumpers JMP1 and JMP2 inside the case select between direct (D) and grid-block (G) modes; factory default is direct/direct (both jumpers in the D position), which is the right setting for the Xiegu X6100 in Vol 9 and any other solid-state HF rig.
For the X6100 specifically, the rig’s CW key jack is a 3.5 mm TRS (tip-ring-sleeve) stereo jack on the right side panel. The 422D’s RCA output mates to the X6100’s 3.5 mm key input via an RCA-to-3.5 mm TRS adapter cable: the RCA center conductor goes to the TRS tip (key line), and the RCA shield goes to the TRS sleeve (ground). The ring of the TRS is unused for a single-paddle or straight-key connection. Hand-build the cable from a 3-foot length of shielded mic cable, an RCA plug, and a 3.5 mm TRS plug; total cost is about $5 in parts, and the cable lives in the X6100 drawer permanently. (Pre-built cables in this configuration are also available from Amazon and ham radio outlets as “RCA to 3.5 mm CW key cable” for ~$10–15.)
TBD — verify the cable on hand: factory adapter, hand-built, or one of the various commercial offerings. The signal-level pinout is the same in all cases; what varies is build quality, shield grounding, and strain relief at both ends. For a connection that lives on the bench permanently, hand-built with proper strain relief outperforms the cheap commercial cables.
2.2.4 Practice workflow vs on-air
The 422D is a sending instrument — its job is to put the operator’s keying onto the air. Practice happens elsewhere (the MFJ-419 in §2, or off-line with the rig in standby mode so the keyer drives the sidetone but no RF is transmitted). The X6100 has a CW practice / no-transmit mode that disables the PA but leaves the keyer and sidetone active; use this for sending practice without taking up bandspace.
Real on-air workflow:
- Plug the 422D into the X6100’s CW key jack (via the RCA-to-TRS cable).
- Power the 422D from its internal 9 V battery or external 12 V supply (2.1 mm coaxial, positive center).
- Set rig to CW mode, tune to a CW segment (e.g., 7.025 MHz on 40 m).
- Press TUNE on the rig (or send a continuous string of dits) to verify the antenna SWR is acceptable.
- Send a CQ at the chosen speed; await a response.
For learning operators it’s normal to “lose the fist” the first few times — sending into open air without an answer is unnerving and beginner-typical errors (dot insertions, dash droops, transposed letters) feel exposed. The cure is more on-air time; the 422D gives the operator a consistent, predictable tool that doesn’t add error of its own.
2.2.5 Battery considerations
The 422D runs on a single 9 V alkaline battery (NEDA 1604A) installed in an internal clip, or on an external 12 V DC supply via a 2.1 mm coaxial jack (positive center, negative sleeve). When external power is connected, the internal battery is automatically disconnected — so a permanently-installed 12 V wall wart (the MFJ-1312B is the vendor’s accessory; any quality 12 V regulated supply works) leaves the 9 V battery as backup-only and extends its shelf life to multiple years. For the bench setup, run external 12 V; for portable / field-day use, the 9 V is the obvious answer.
Current draw is very low (<50 mA peak with sidetone) so a fresh alkaline 9 V lasts many tens of hours of operation. As with the 419: remove the battery if the unit will sit unused for months.
2.2.6 Cross-link
For the receiving-side X6100 CW configuration (audio filter bandwidth, CW pitch, semi-break-in delay, narrow filter selection), see Vol 9 §3 (Operating modes) ↗ where the X6100’s CW-specific menu items are documented.
Comments (0)